Go to the View tab and click Page Layout on the left of the Ribbon Menu.
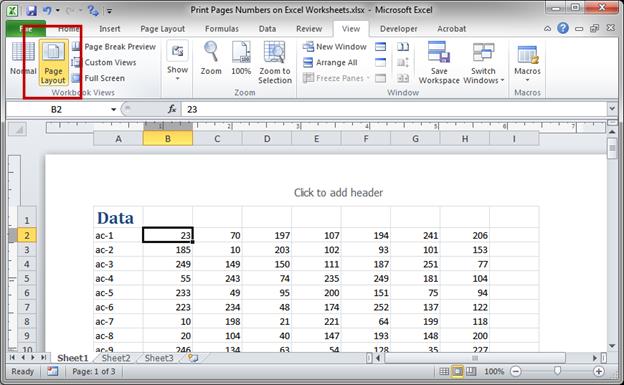
Click one of the 3 sections of the header or scroll down and click one of the 3 sections of the footer. (Each section is for spatial reference and allows you to put data on the left, right, or in the middle of the header/footer.)
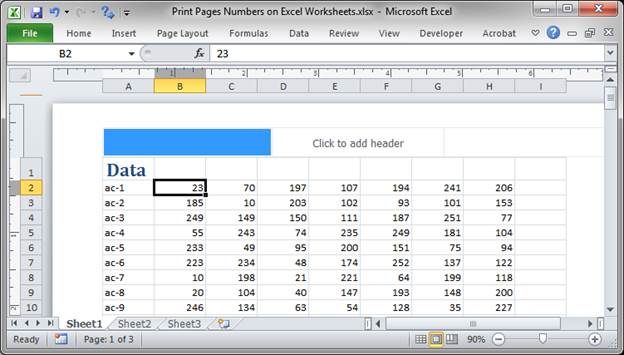
Or footer:
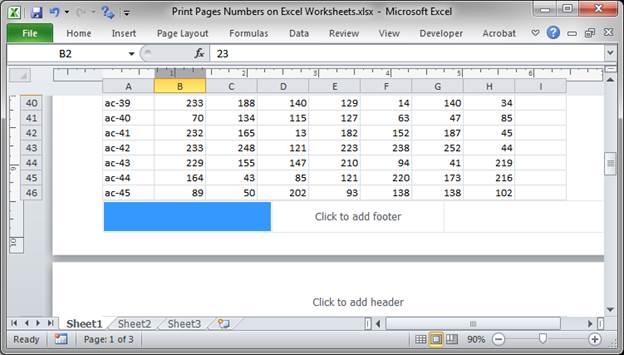
On the Design tab that should have appeared, click Page Number.
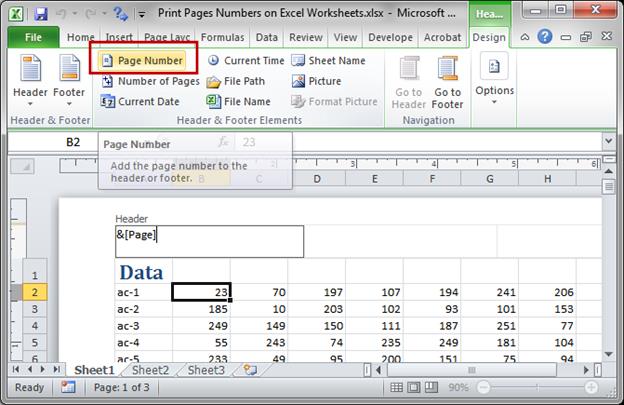
Once you click away from the header/footer, you will see the result:
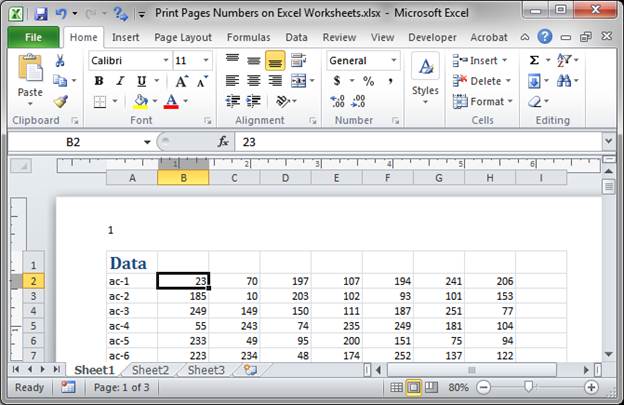
You can add more text around the numbers; look to the next sections for more information.
Add "Page # of [Total Pages]"
This format is: Page 1 of 2
Go to the View tab and click Page Layout and click a section in the header or footer and then, on the Design tab, click the Header option on the left and choose the 3rd option from the top.
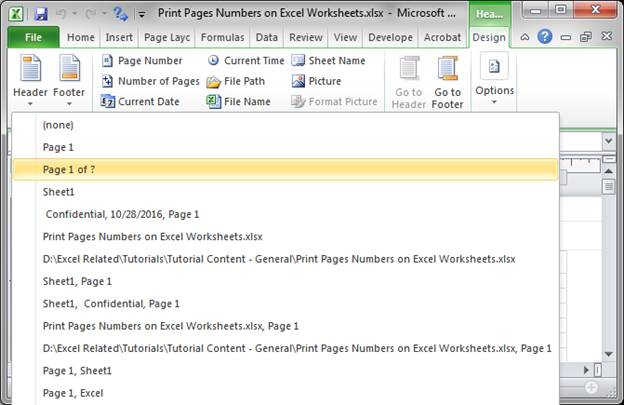
It will automatically put the result into the middle section for you.
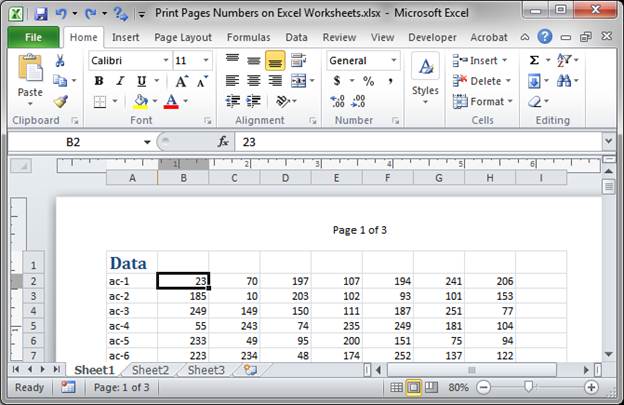
Move the Text out of the Middle
To move it out of the middle, just click in the middle, select the data that appears, cut it, and paste it onto one of the sides.
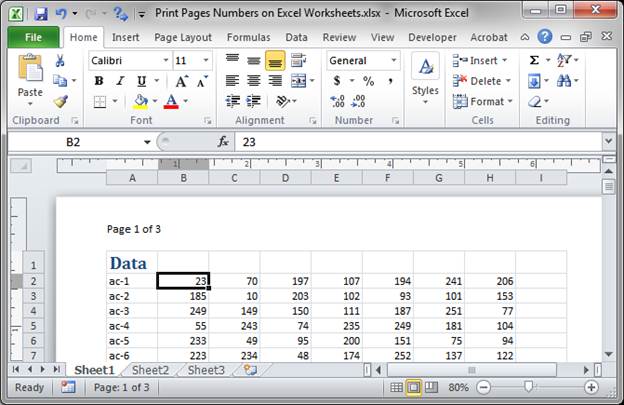
Add Custom Text
In the last examples you may have noticed that the text that appears is different from what goes into the header/footer when you edit it.
A sort of mini-language is used for printing and this allows us to add normal text around it.
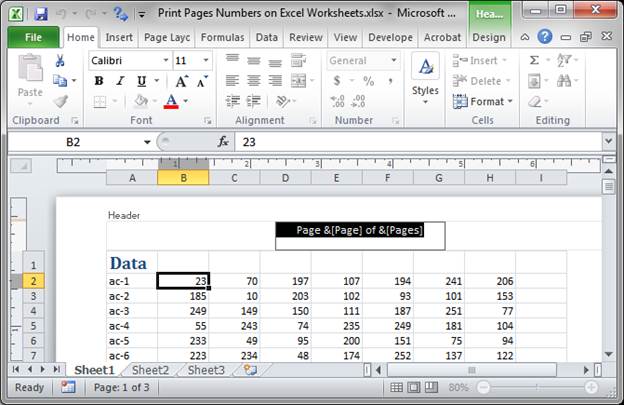
Go to the header and type This is page and a space and then click the Page Number button, another space, and then type of and another space, and finally, click the Number of Pages button. It will look like this:
This is page &[Page] of &[Pages] 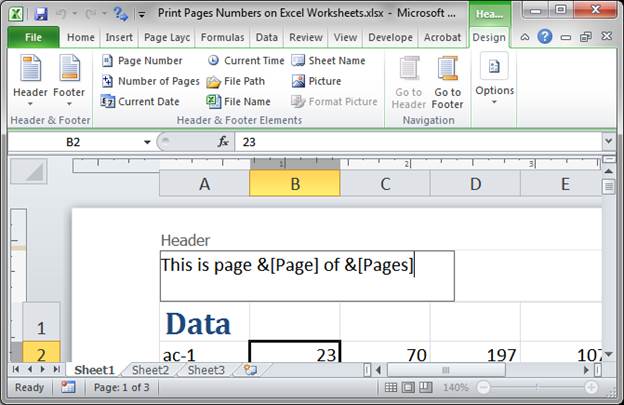
Result:
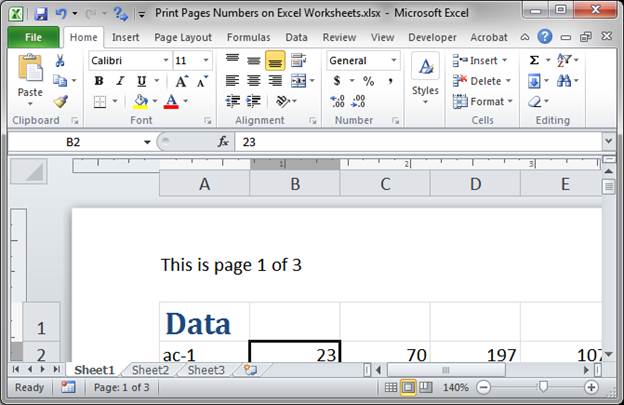
You can put basically any text you want. The special elements start with an ampersand & and have square brackets around them.
By going to the Design tab for the header/footer, you can see options for the data that you can input in the Header & Footer Elements section. Also, by clicking the Header or Footer buttons on the left of the ribbon menu, you will see many pre-made options that can be useful and save a bit of time.
Notes
Working with headers and footers is a very important feature to make more professional looking spreadsheets when they are printed.
Make sure to download the sample file for this tutorial to work with these examples in Excel.
Source:TeachExcel
You received this message because you are subscribed to the Google Groups "Keep_Mailing" group.
To unsubscribe from this group and stop receiving emails from it, send an email to keep_mailing+unsubscribe@googlegroups.com.
To post to this group, send email to keep_mailing@googlegroups.com.
Visit this group at https://groups.google.com/group/keep_mailing.
To view this discussion on the web visit https://groups.google.com/d/msgid/keep_mailing/CAG%3DbiTsN9J_eudwwc_JnzRWR_2v3p4Qde4VR8H5YGQ1KF54nnQ%40mail.gmail.com.
For more options, visit https://groups.google.com/d/optout.
No comments:
Post a Comment